How to Build a HIPAA-Ready Patient Portal Using DrapCode
Nov 3, 2025

Patient expectations in healthcare have changed. They now want secure online access to medical records, appointments, prescriptions, billing, and communication, all in one place. A well-designed HIPAA-ready patient portal helps healthcare providers enhance patient experience, streamline administrative workload, and ensure data privacy.
But building such a portal from scratch can take 6–12 months, requires high engineering and compliance costs, and involves complex HIPAA regulations. This is where DrapCode, a no-code platform for healthcare, becomes a game-changer.
This guide explains how to build a HIPAA-ready patient portal using DrapCode more efficiently, securely, and without writing code, while maintaining compliance standards.
What is a HIPAA-Ready Patient Portal?
A HIPAA-ready patient portal is a secure web platform that enables patients to access and manage their health information online, ensuring that protected health information (PHI) is stored, transmitted, and processed in accordance with HIPAA guidelines.
A HIPAA-ready portal enables patients to:
- View medical records, test results & prescriptions
- Book and manage appointments
- Communicate securely with care providers
- Receive notifications, documents, and care plans
- Manage billing, insurance, and payments
To ensure compliance with HIPAA standards, DrapCode supports secure infrastructure and workflows.
Why Healthcare Providers Need a HIPAA-Ready Patient Portal
A modern patient portal is no longer a “nice-to-have”; it directly impacts patient trust, operational efficiency, and the quality of care.
Key Benefits for Providers
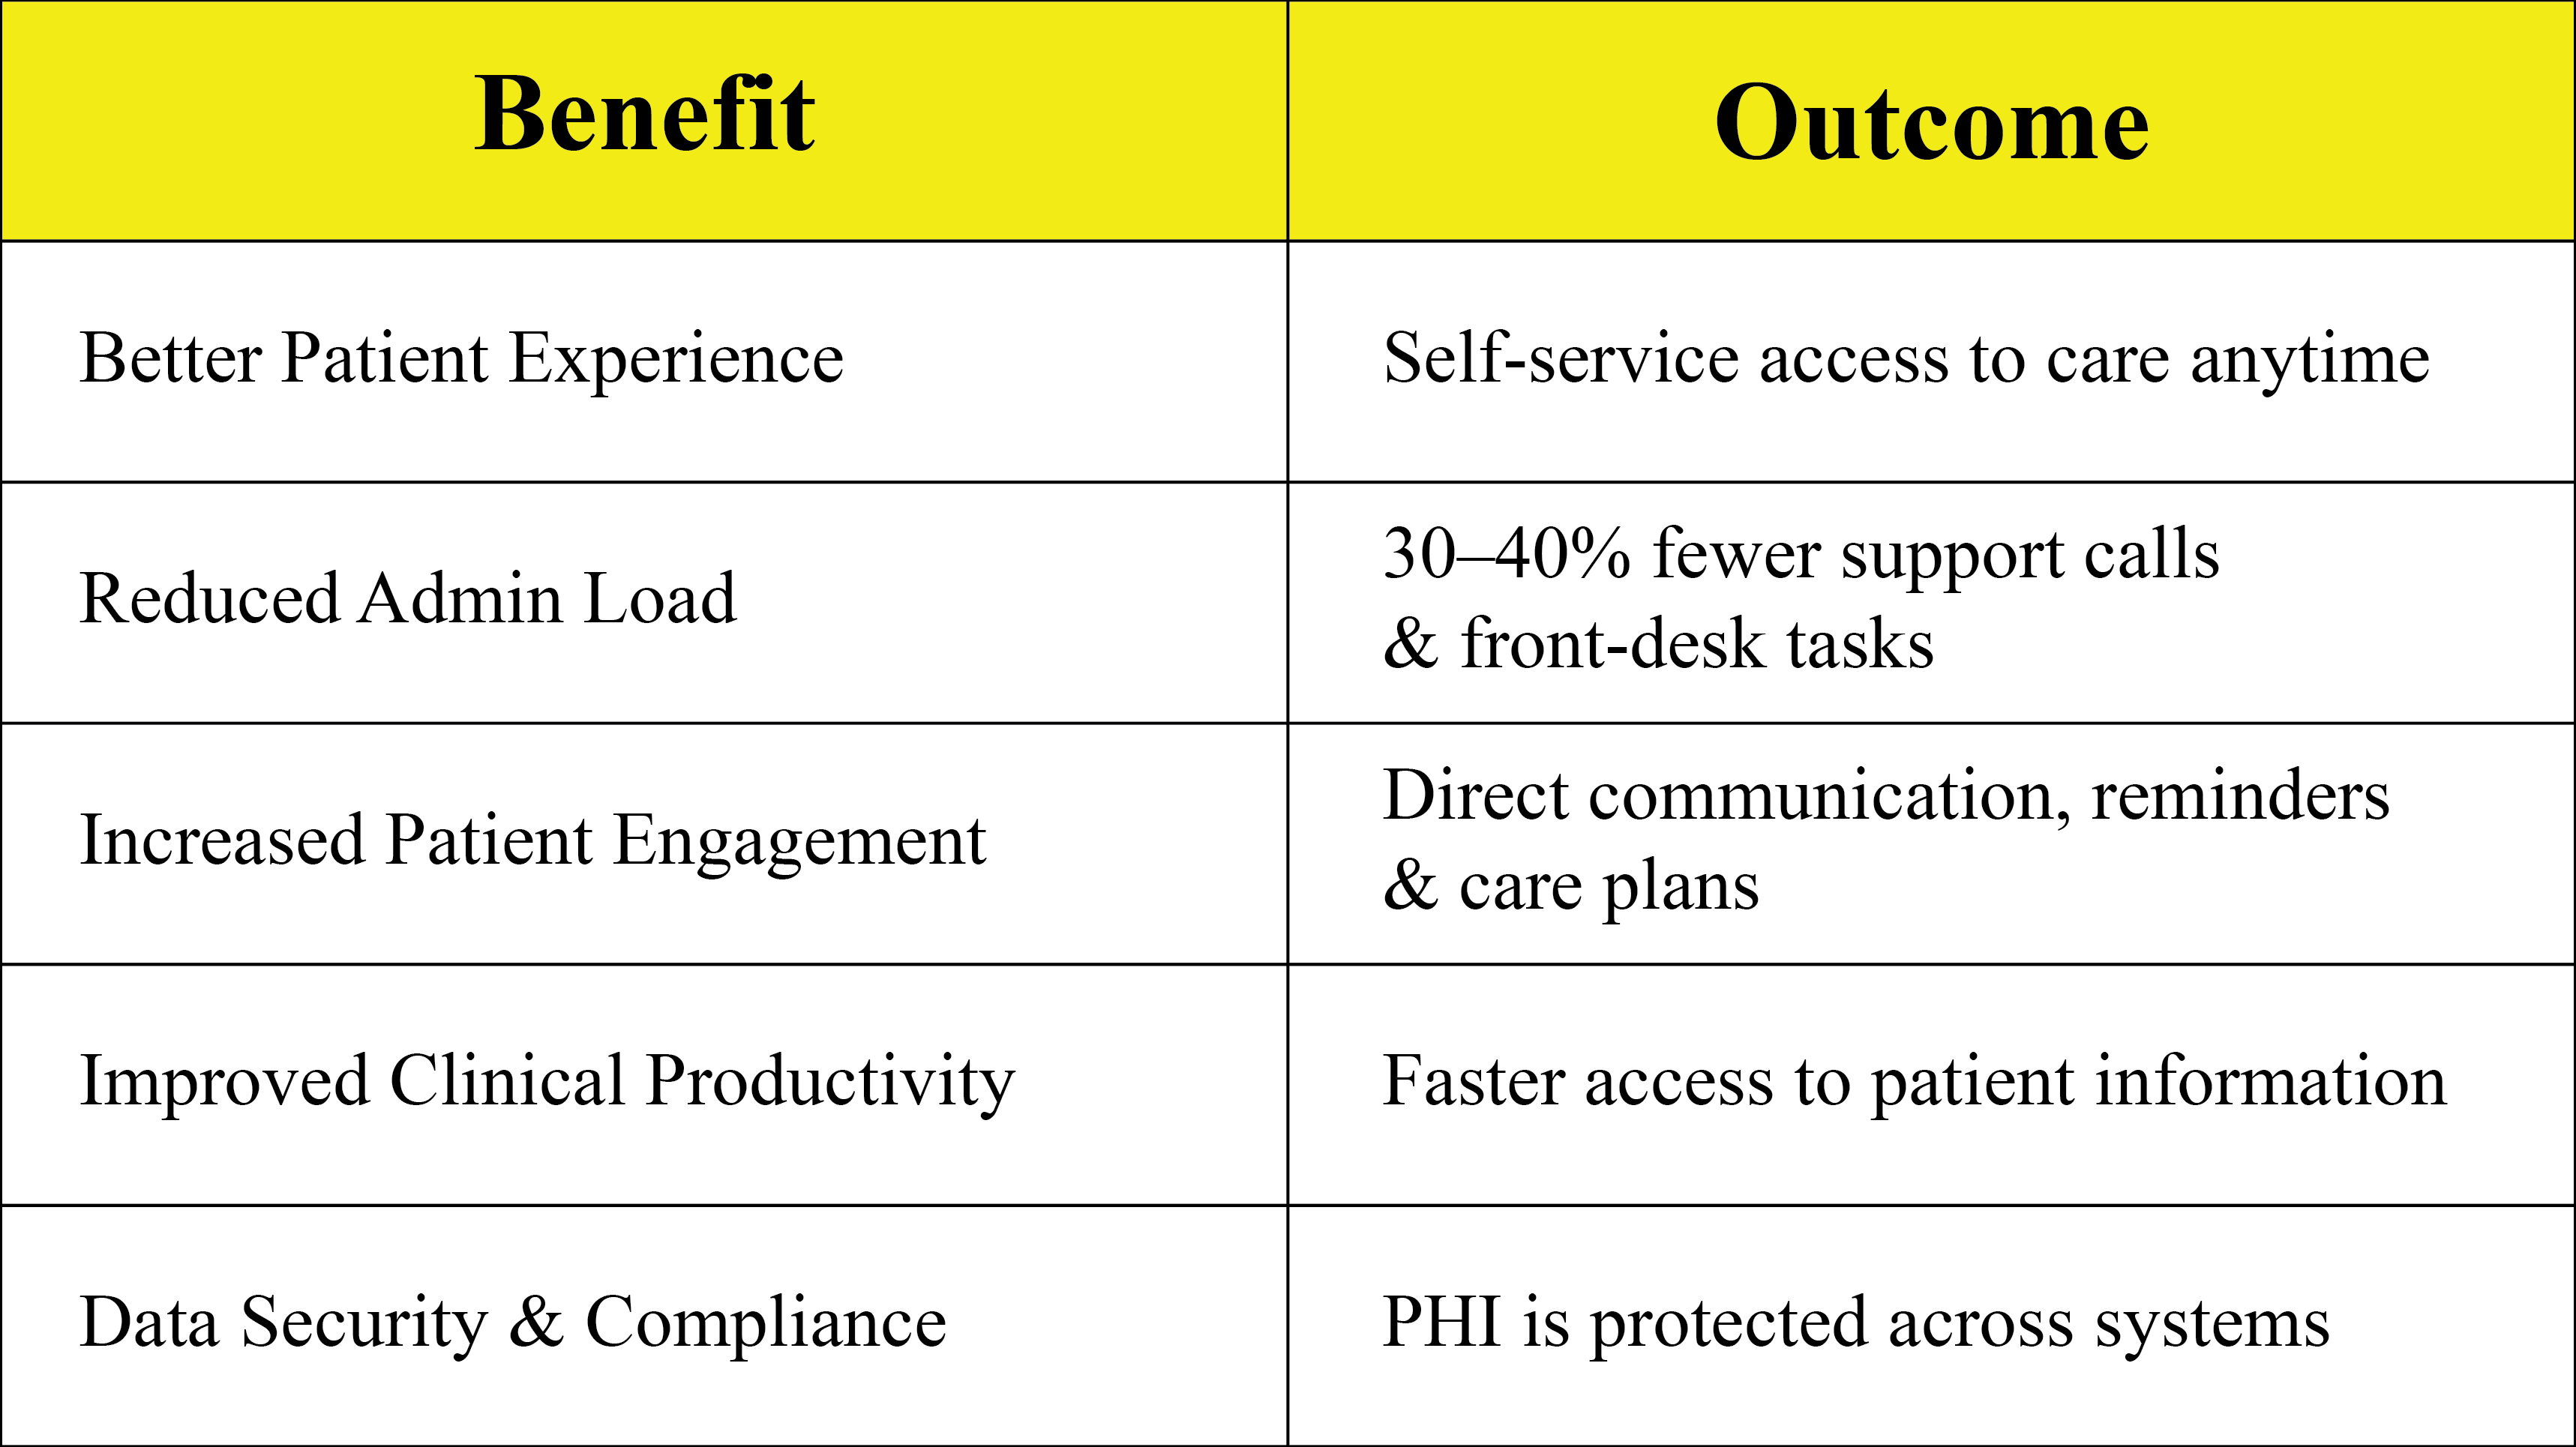
Healthcare founders, clinic owners, and CTOs are increasingly opting for no-code healthcare platforms to accelerate digital adoption. DrapCode provides pre-built healthcare modules and integrations designed to accelerate healthcare product development.
Core Features Your Patient Portal Should Include
A high-performing, HIPAA-ready patient portal typically includes these key modules:
Patient-Facing Features
- Secure patient onboarding & login
- Profile & medical record access
- Appointments, scheduling & reminders
- Lab results, prescriptions & treatment history
- Chat or message center for doctor-patient communication
- Insurance & Billing Section
- Document uploads & e-signature
- Mobile-responsive UI
Admin & Provider-Side Features
- Role-based access for clinical staff
- Patient record management
- Case notes & treatment updates
- Appointment & workflow automation
- Secure messaging & audit logs
- Analytics & patient engagement tracking
HIPAA-Aligned Architecture: What to Keep in Mind
Even when using no-code solutions, your patient portal must adhere to HIPAA-aligned design principles. DrapCode supports secure infrastructure and workflows to protect PHI.
Must-have architectural considerations:
- Encrypted data at rest & in transit
- Role-based access control and audit logging
- Secure authentication and session control
- Data access minimization
- Backup and breach response systems
- Integrations that maintain PHI security
How to Build a HIPAA-Ready Patient Portal Using DrapCode (Step-by-Step)
Step 1: Define Your Core Use Cases
Examples:
- Multi-clinic patient portal
- Telehealth-enabled patient portal
- Specialist-specific portals (dental, mental health, physiotherapy)
- Pediatric or family-care portal with guardian access
Step 2: Configure User Roles & Access
Set up role-based access for:
- Patients
- Doctors/Providers
- Admin/Support
Ensure each role only sees relevant PHI.
Step 3: Create Patient Dashboard & Core Modules
Build screens for:
- Patient profile
- Medical records & files
- Appointments & reminders
- Messages & communication
- Billing & insurance
Use DrapCode’s drag-and-drop UI builder to customize layouts without code.
Step 4: Add Secure Communications
Add messaging or appointment chat, ensuring PHI is visible only to defined roles.
Step 5: Integrate EHR/EMR or Third-Party Systems
Connect with:
- EHR systems
- Insurance verification
- Billing platforms
- CRM or workflow tools
Use APIs or ready-to-use integrations.
Step 6: Enable Analytics & Engagement Tracking
Track:
- Appointment attendance
- Portal usage
- Patient activity
- Communication metrics
Step 7: Test, Review & Deploy
Run tests for:
- Access control
- Data flow restrictions
- User experience
- Mobile optimization
Publish your portal and onboard your first patients.
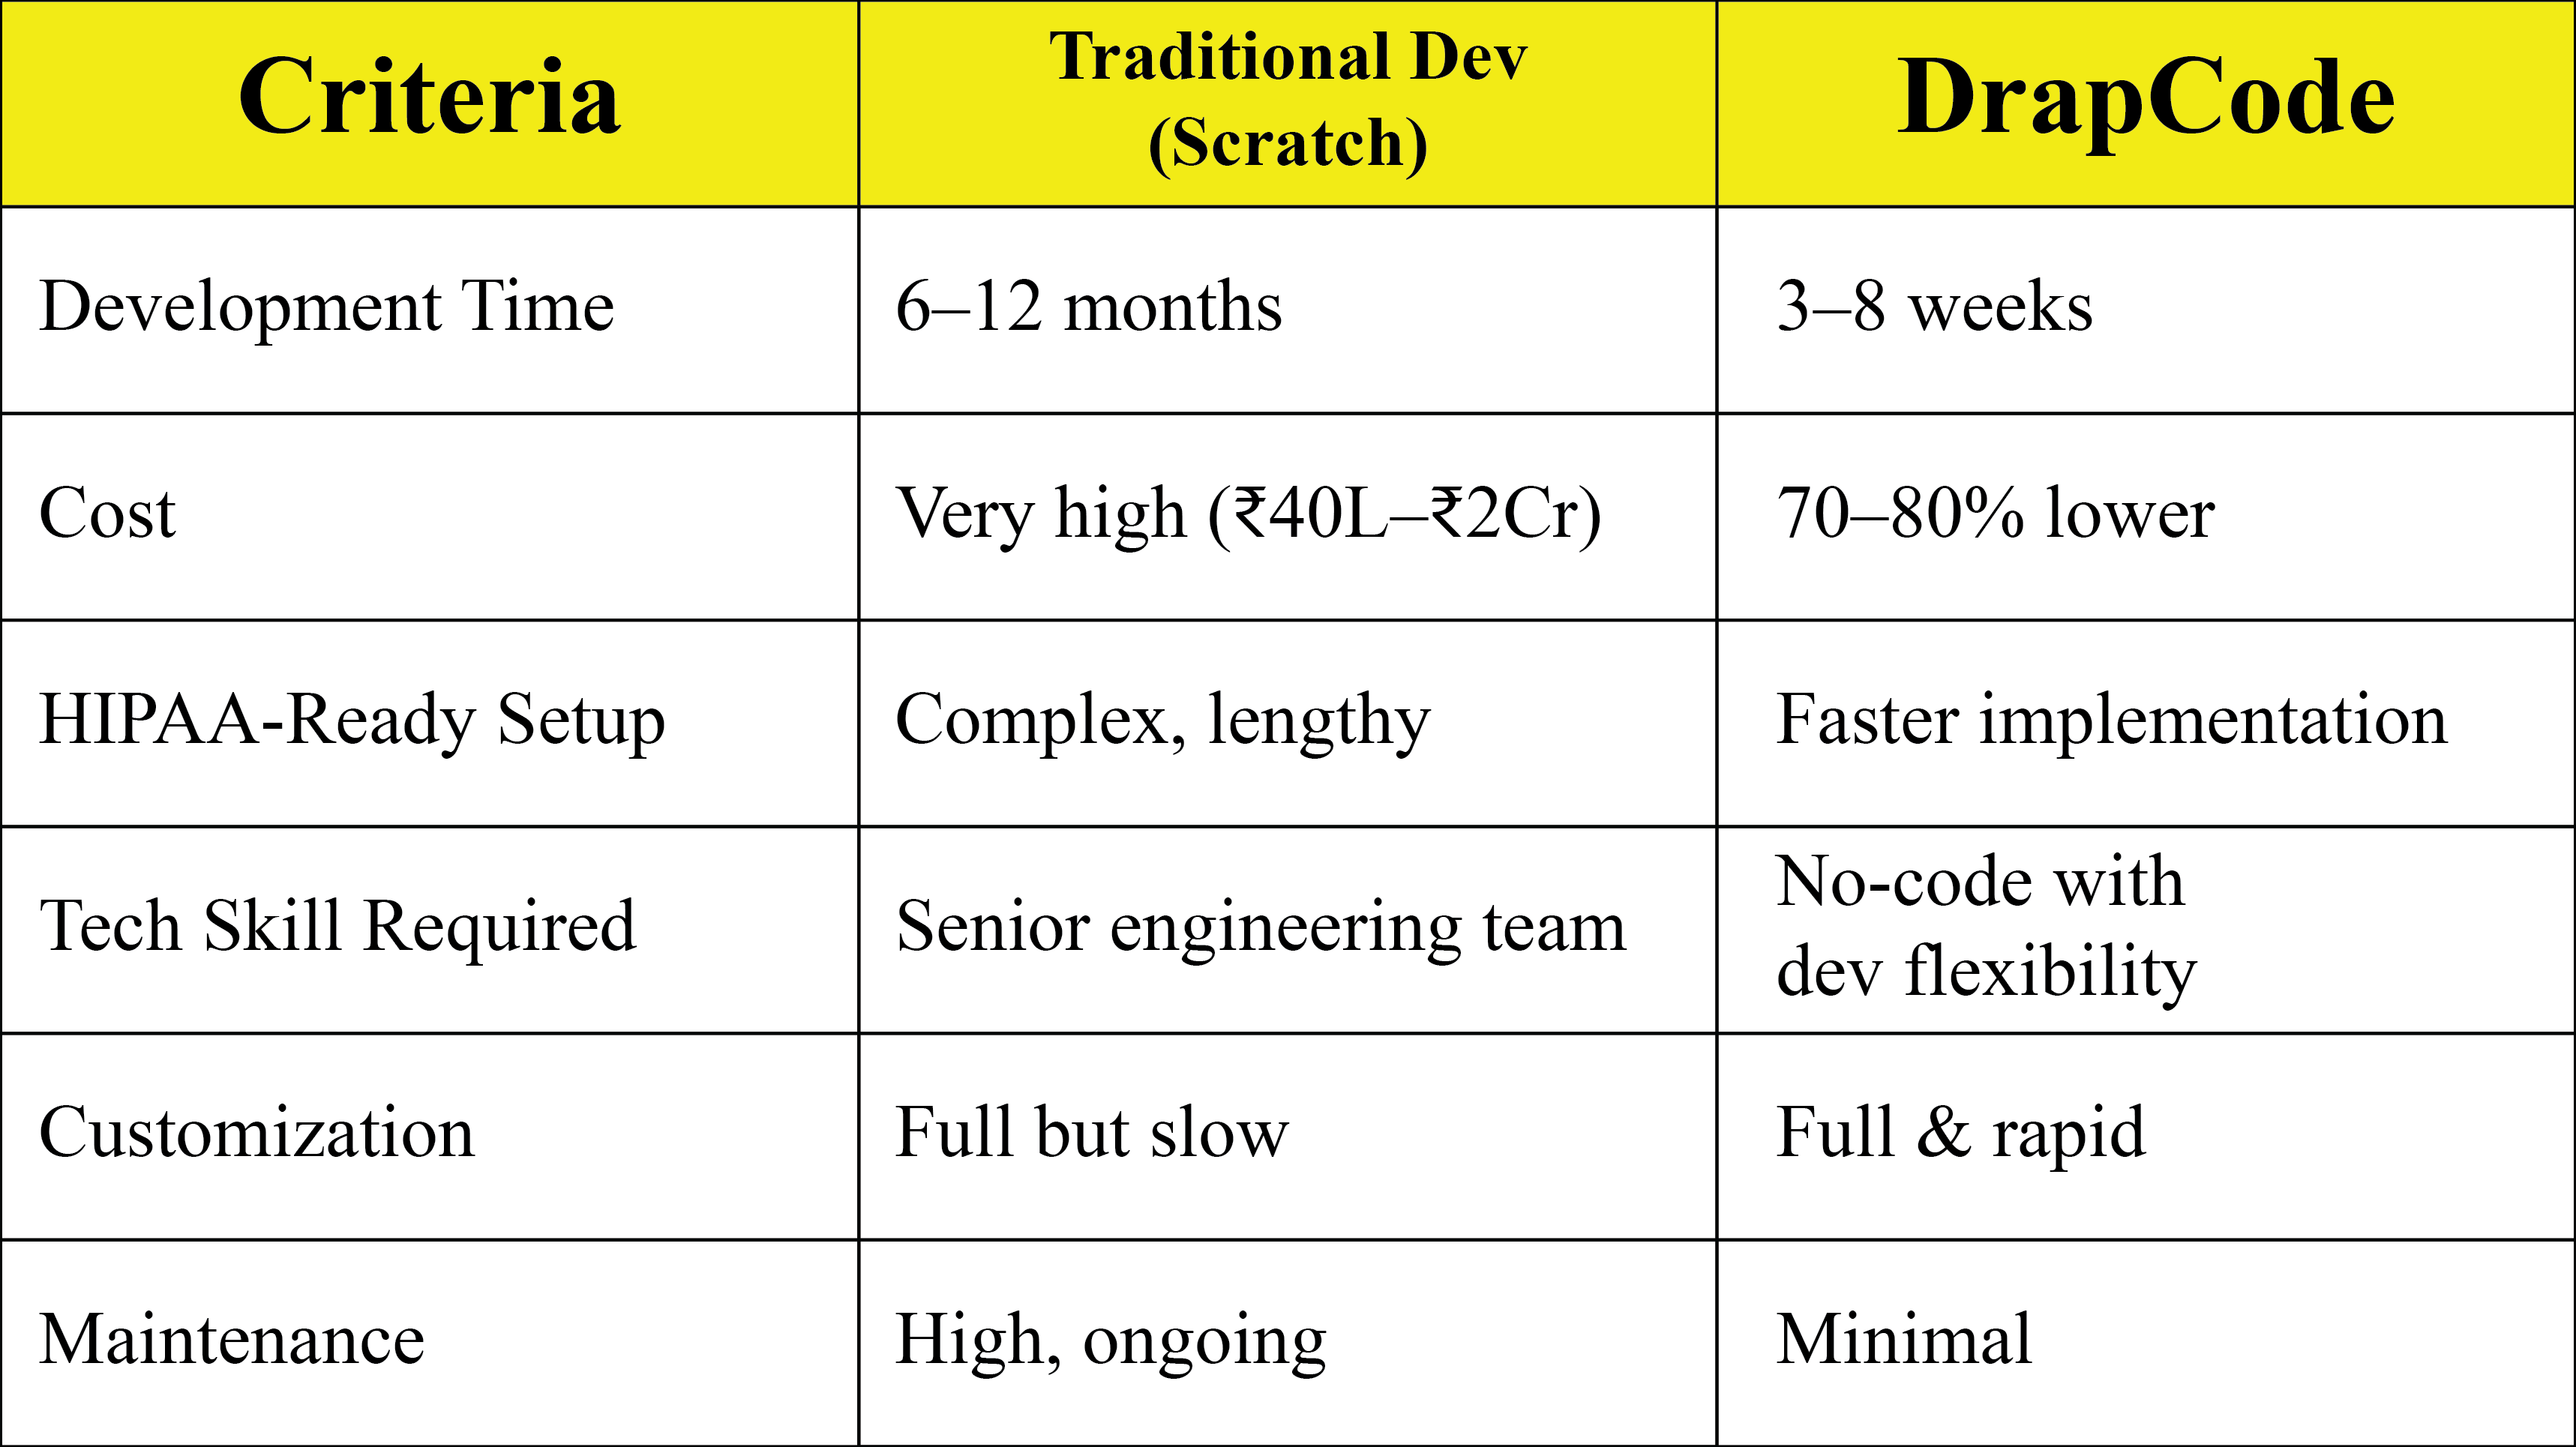
Build From Scratch vs Using DrapCode — Comparison
Mini Case Study: Mid-Size Clinic Launches Portal in 5 Weeks
A 4-clinic healthcare provider sought a patient portal that integrated appointment scheduling, test results, and messaging. Traditional vendors quoted 5–7 months.
Using DrapCode, they:
- Built patient onboarding, doctor dashboard & messaging in 3 weeks
- Integrated lab results & appointment reminders in week 4
- Rolled out pilot to 120 patients in week 5
Outcome:
47% increase in patient engagement, 32% fewer front desk calls, and improved patient satisfaction scores.
Blogs & Insights
We'd love to share our knowledge with you. Get updates through our blogs & know what’s going on in the no-code world.